Coulee Region Fieros
Serving Fiero lovers in the La Crosse and Eau Claire areas.
Exhaust Manifold Porting
Getting rid of some poor quality GM production!

Porting exhaust manifolds is not tough but it is time consuming. I spent about 5 hours porting my manifolds. I think that the way that I did it was quicker, but I am not sure that everyone has a mill attached to their drill press, or a drill press for that matter. All of this can be done with a rotary tool but the drill press made it a lot quicker.
Tools:
Everything that you need to remove the manifolds
Drill press with mill attachment
rotary tool with plenty of grinding bits
6 lag bolts
4x4 piece of lumber
safety glasses (THIS IS A MUST!!!)
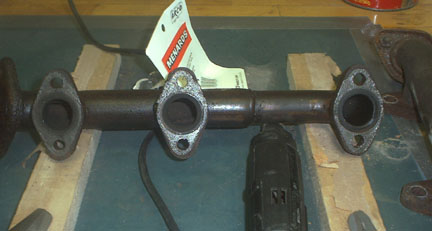
First you must remove the exhaust manifolds. This can be tough because they are pretty well rusted in place. If you are lucky you can get a spare set. I happen to have a mostly complete engine sitting in the garage so I just took the manifolds off of that. On to the porting. The goal is to remove two major restrictions in the manifolds. First is the welding bead right in the entry. Circled in red.
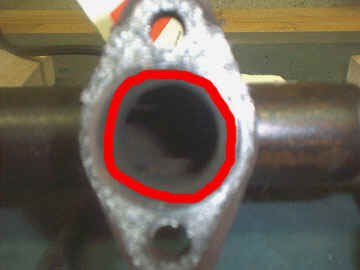
It is hard to see in the picture but you will feel it when you get the manifolds off. This obstruction is on all three ports. This is fairly easy. However grinding this off will weaken the weld so you need to reweld where the foot meets the pipe. This can cause some problems because the metal will warp when heated. I rewelded mine when the where attached to 4x4 cheap piece of pine. Some people have used steal of extra heads they have laying around. The point is that they need to stay flat or they will not seal when you reinstall them. The next restriction that needs to be taken out is only in two of the ports but it takes some time.
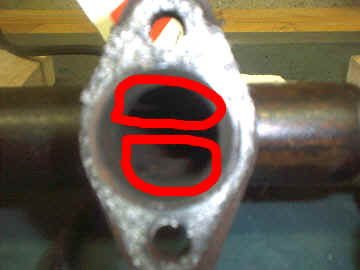
These are left over from the welding process where the small tubes are connected to the main tube. This is where the drill press came in.
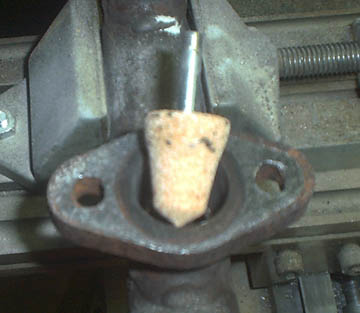
This is the bit that I used. There are some important things I learned. cheap bits don't cut it, I snapped two bits in 30 seconds granted they were just $.79. Also make sure that the manifold is in the vise straight. If it is not in straight it will get stuck or snap once you get it down in there a little. I ran the bit at 4300 rpms and it cut nice. Take it slow! This will get most of it. I cleaned up the rest with the rotary tool. Then I took a disc type bit and cleaned up the sides.
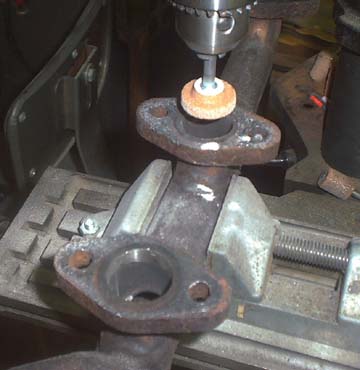
There are two things that you can see here. First, you can see that the welding bead is evened up with the rest of the tube. Second, you can see how I had everything set up. You might ask how the disc wheel fit. I used a dressing tool to trim down the size of the wheel. If you are not using a drill press you can use a rotary tool with grinder bits or you can use a die grinder with grinding bits or carbide cutters. The carbide cutters are expensive but you only need one. I went through 6 grinder bits on my rotary tool to just clean up what was missed on the drill press and cleaning up the reweld burn through.
Now, you need to weld. There are a few things to note. One, it would be easier to weld before you grind because the weld will burn through in spots. Second, the manifold are stainless steel which means they need special welders to weld them. If you are welding them your self you will need some stainless steel wire to work on these on a wire feed. If you are using an arc welder you will need stainless steel rods. I welded mine in my welding class on a mig running stainless steal wire. Or you can bring them in and have them welded just make sure that you tell them that it is stainless steel. Third, you need a way to keep them from warping. For this I use a 4x4 to bolt the manifolds down to.
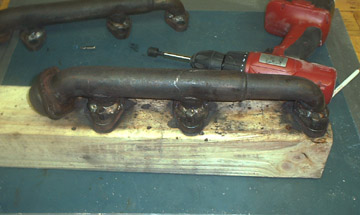
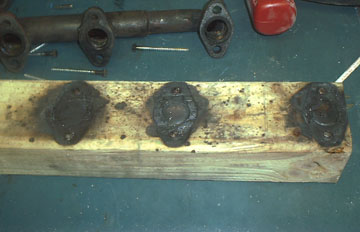
As you can see from the picture the board will be shot after you use it for this. The board is about 6 inches longer than the manifold so I had a place to grab on to after I welded them. I drilled 6 pilot holes for the lag bolts. As you can see in the picture the lag bolts got fried also. Then I just bolted it down and welded away. If you don't know how to weld this is not a good place to start. Remember to clean them off the best you can before you weld them.

In the picture above you can see a second ridge. That is the burn through that I had to regrind this one was the worst, on the other ports it was just a dot or two. Regrind that and you are done. I also polished up the ports a a little because they were a little rough from the grinding.
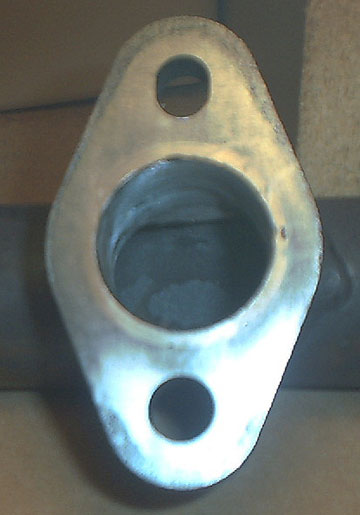
This is just a picture of the finished port.
This information is used at the owners risk. Coulee Region Fieros or any of its members cannot be held responsible for any damage to yourself or property.